Table of Contents
KS-TKEP Upgrade
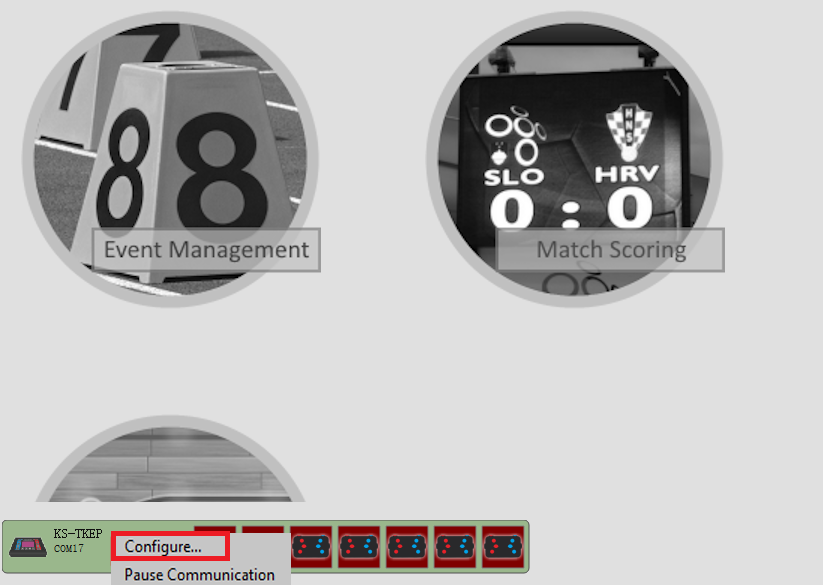
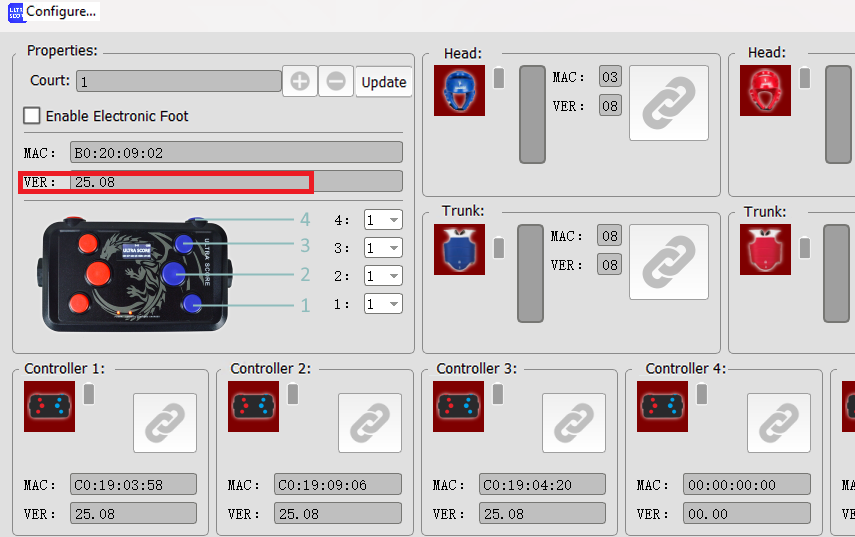
Check the current version information of the communication host and click the “Configure” item in the pop-up menu.
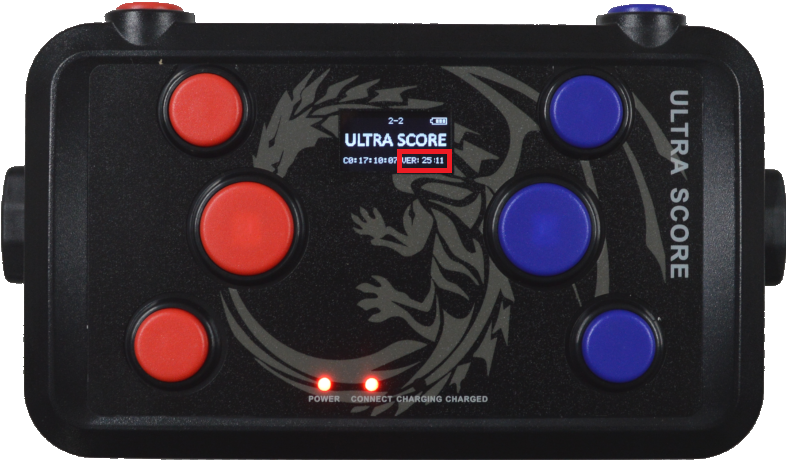
Check the current version information of the judge controller, turn on the judge controller's power.
Click the link below to download the upgrade tool and upgrade package
https://www.kazovision.com/sports/ultrascore/devices/ks-tkep/
Host upgrade
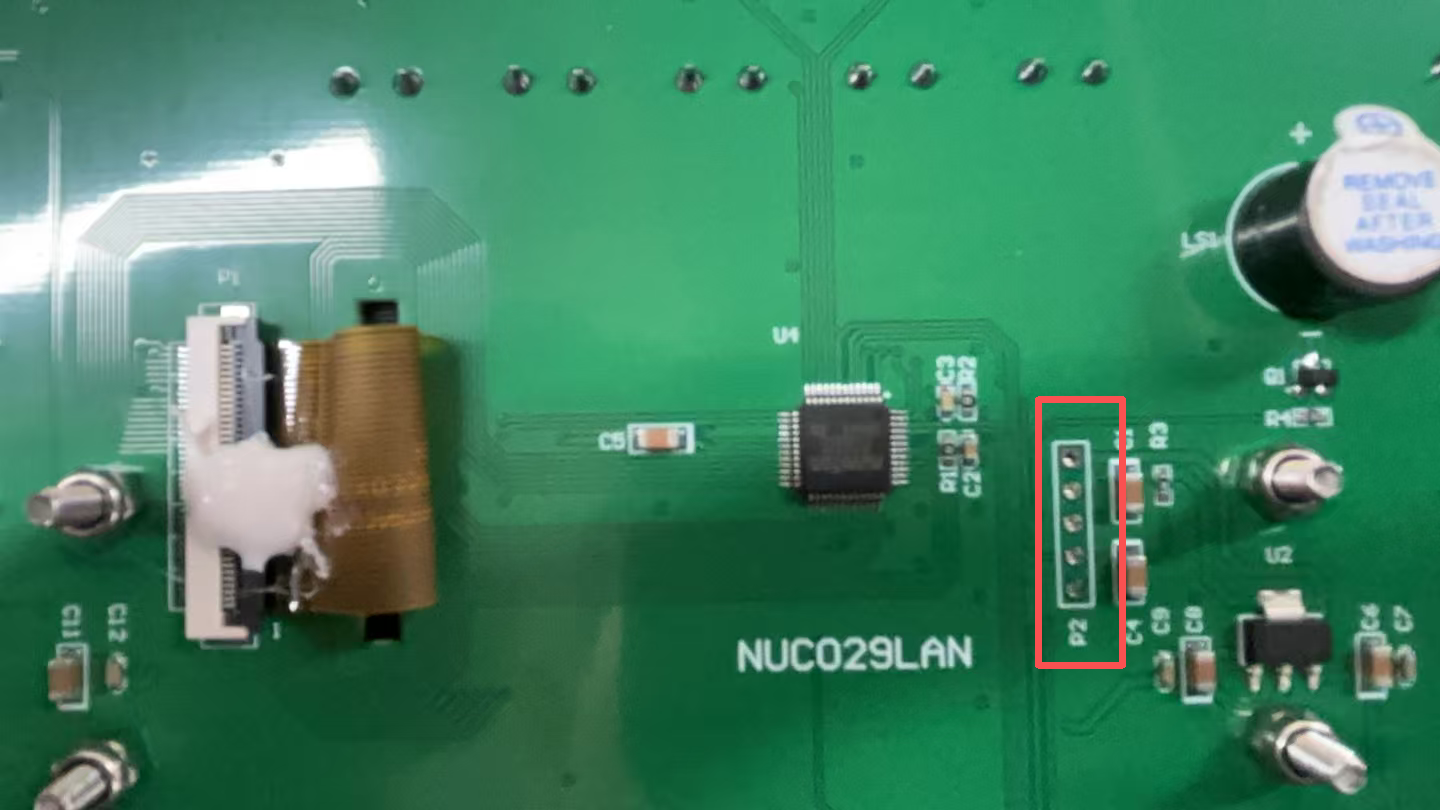
Use a screwdriver to remove the screws on the back panel of the communication host. There are two main control panels inside as shown in the figure below:
Install the upgrade programming software “NuMicro_ICP_Programming Tool.exe”. Connect the programmer to the USB port of the computer.
Open the previously installed programming software “Nuvoton NuMicro ICP Programming Tool” on the computer. Then click “Continue”.
Click the “Connect” button.
Click the “APROM” button in “Load File”, select the firmware “master_u1.bin” and open it. In “Program”, check “APROM” and “Configuration Area”.
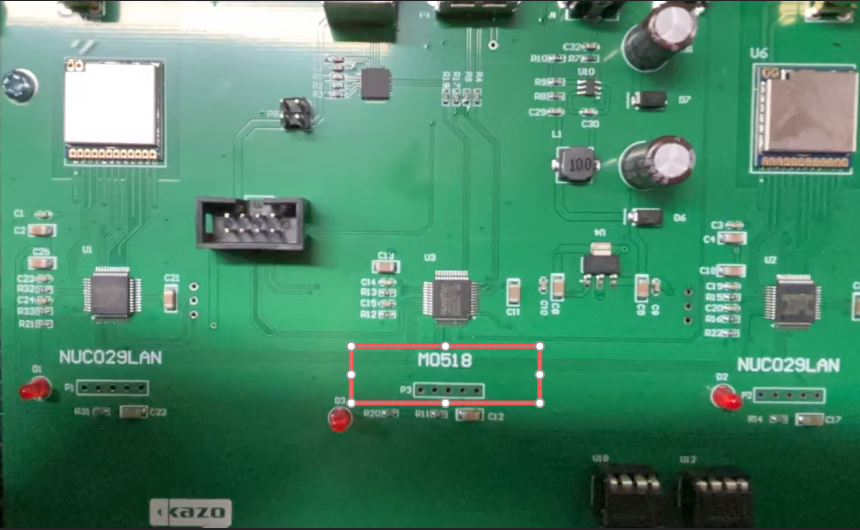
At this point, insert the programmer into the P1 programming hole of the main control panel. Note: The red wire corresponds to the square hole of P1.
After the programmer recognizes the chip normally, the red text at the top will turn green and display the chip information.
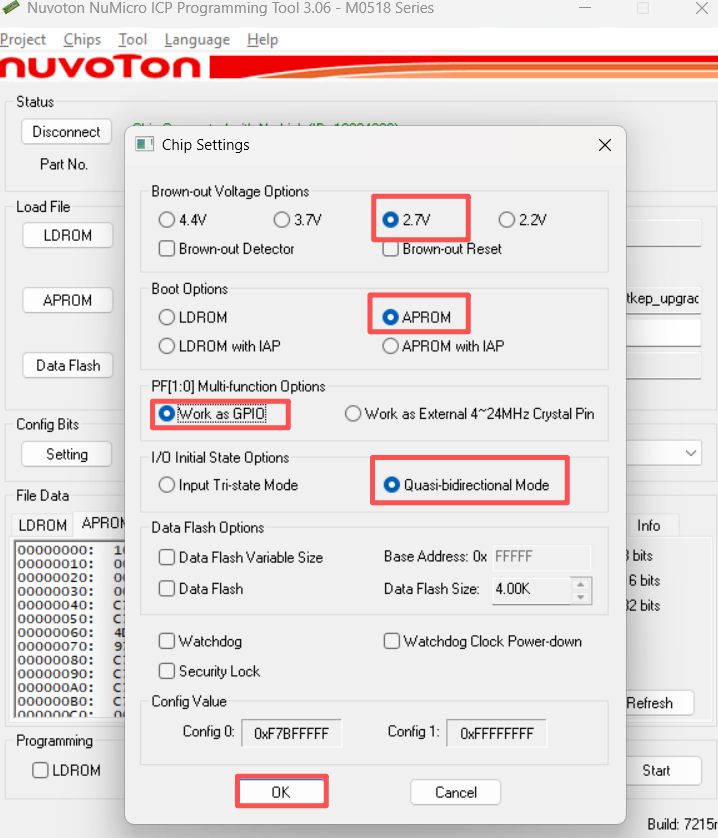
Click “Settings” to configure the chip options. Click “OK”. In the programming software, click the “Start” button.
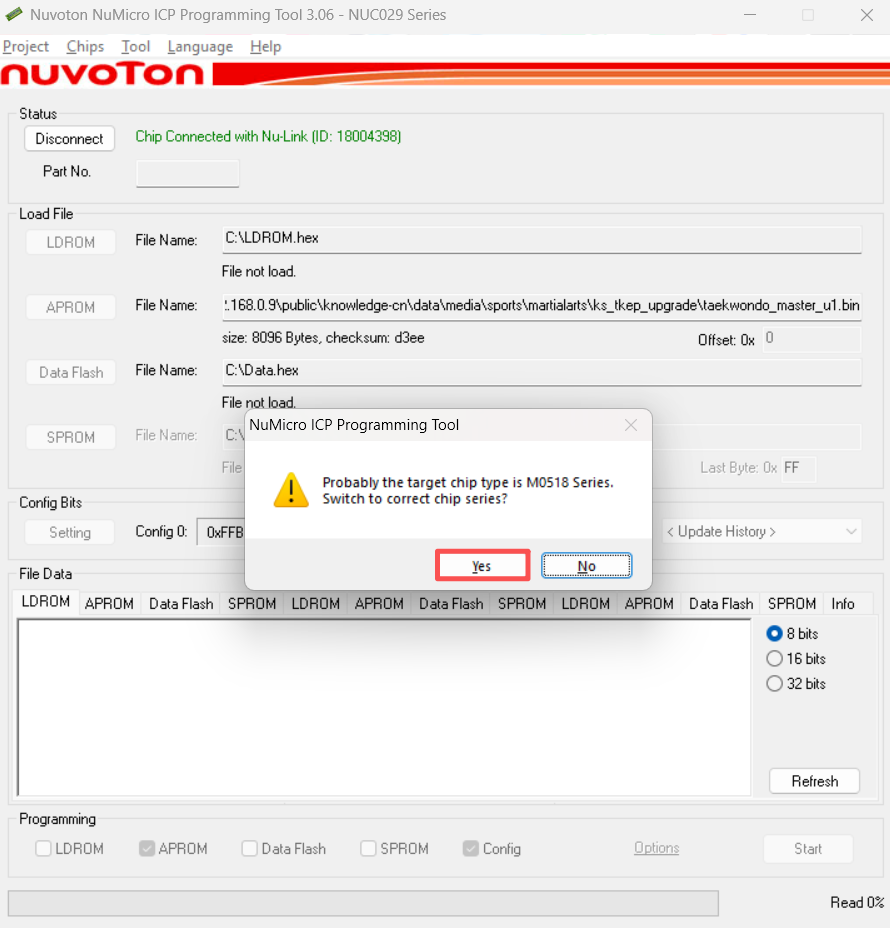
At this point, the following page will pop up. Click the “OK” button and then the “No” button.
Wait until the progress bar reaches 100%.
Programming completed.
Follow the above steps to program the U2 chip and U4 chip in sequence. For the U2 chip, select the programming file: “master_u2.bin”. For the U4 chip, select the programming file: “master_skey.bin”
Next, upgrade the U3 chip. Click the “APROM” button in “Load File” and select the firmware “master_u3.bin”. In “Program”, check “APROM” and “Configuration Area”.
Judge Controller Upgrade
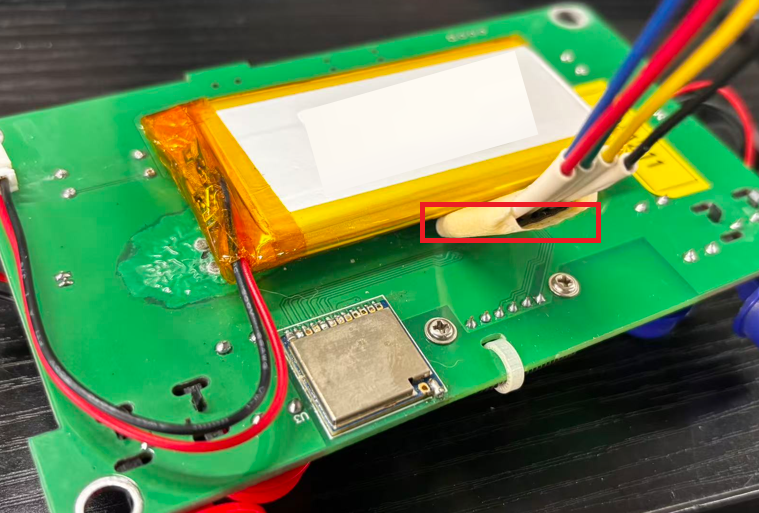
Use a screwdriver to remove the screws on the back panel of the judge controller. Refer to the upgrade steps for “master_u1” to complete the burning of the U4 chip and import the firmware file named “handy.bin”. Insert the programmer obliquely into the main control panel facing the battery board. After the programmer recognizes the chip normally, the red text at the top will turn green and display the chip information. At this time, the judge controller will vibrate (this is a normal phenomenon).
Body Controller Upgrade
Open the previously installed programming software “Nuvoton NuMicro ICP Programming Tool” on the computer. Then click “Continue”.
Click the “Connect” button.
Click the “APROM” button in “Load File”, select the firmware “body_nuc029sge.bin” and open it. In “Program”, check “APROM” and “Configuration Area”.
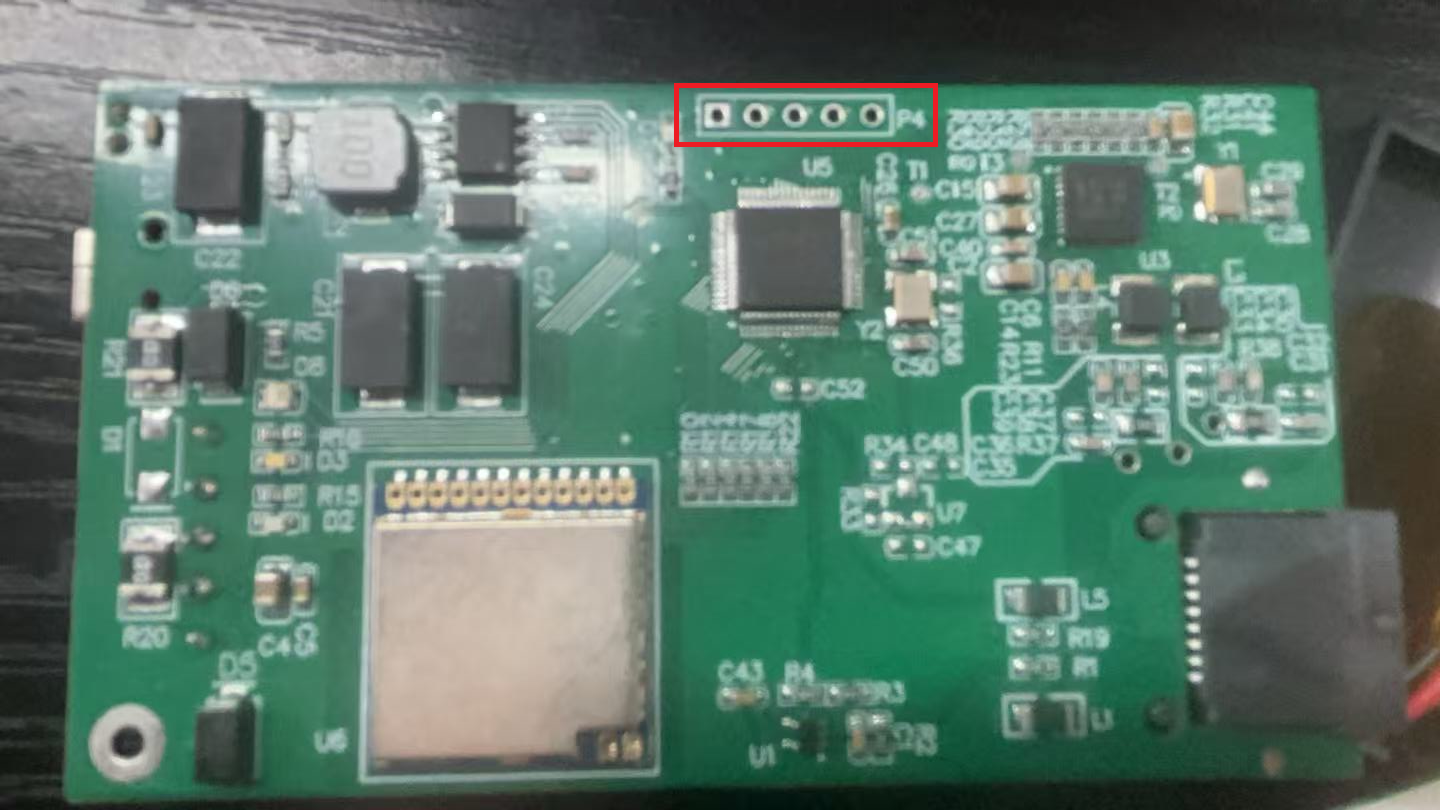
At this point, insert the programmer into the P1 programming hole of the main control panel. Note: The red wire corresponds to the square hole of P4.
After the programmer recognizes the chip normally, the red text at the top will turn green and display the chip information.
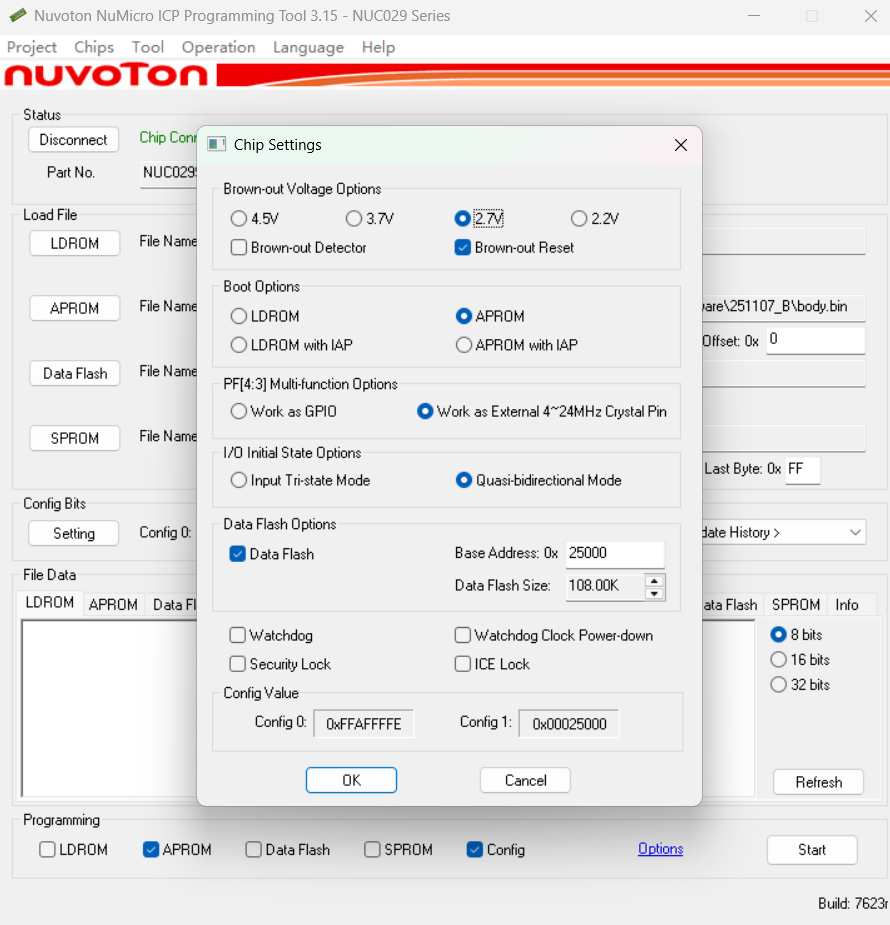
Click “Settings” to configure the chip options. Click “OK”. In the programming software, click the “Start” button.
At this point, the following page will pop up. Click the “OK” button and then the “No” button.
Wait until the progress bar reaches 100%.
Programming completed.
